Learning to Cross-Country Ski as an Adult Foreigner
So, you’ve moved to Norway, admired the picture-perfect winter landscapes, and now you’re seeing practically every single Norwegian effortlessly gliding through the snow on what looks like impossibly thin skis. You might feel a mix of awe and dread, thinking, "There’s no way I can do that as an adult foreigner." Trust me, I’ve been there – feeling clumsy and self-conscious while locals, from toddlers to octogenarians, elegantly cross-country ski past. But don't despair! This comprehensive guide will walk you through everything you need to know to not only survive, but actually thrive and enjoy learning cross-country skiing, or langrenn, as an adult in Norway.
The Allure and Initial Hurdles of Langrenn
Stepping into the world of cross-country skiing can feel like entering a secret Norwegian club, especially when you see the sheer proficiency and comfort locals have with it. But there's a good reason why langrenn is such a central part of Norwegian identity and lifestyle, and it's absolutely within your reach, regardless of your age or prior experience.
Why Cross-Country Skiing? Culture, Health, and Nature
Cross-country skiing isn't just a sport here; it's a way of life, deeply ingrained in the culture of friluftsliv, the love of outdoor life. On any given winter weekend, you’ll find families, friends, and solo adventurers flocking to the nearest groomed trails. It’s their equivalent of a casual stroll in the park, but with added physical benefits and breathtaking scenery. For an expat, embracing langrenn is one of the quickest ways to connect with Norwegian culture and truly understand the national psyche. It’s how you join the ranks of those who genuinely appreciate the winter, rather than just enduring it.
Beyond the cultural immersion, cross-country skiing is an incredible full-body workout. It engages your core, legs, and arms, offering a low-impact cardiovascular exercise that burns calories and builds endurance without the jarring impact often associated with running. Think of it as a moving meditation – the rhythmic glide, the quiet crunch of snow under your skis, the crisp winter air in your lungs. It’s a fantastic way to combat the often dark and gloomy Norwegian winters, providing essential vitamin D (if the sun ever shows its face!) and a significant mood boost. Plus, the Norwegian landscape, from vast forests to open mountain plateaus, transforms into an accessible playground once the snow falls, offering serene beauty that's perfect for exploration. You’ll understand why everyone here wants to get out there; it's pure magic when you finally click with it. If you want to dive deeper into the general philosophy of enjoying the outdoors here, take a look at our guide on Friluftsliv: Embracing the Norwegian Outdoors and "Right to Roam".
Common Misconceptions and First-Timer Fears
Let's be honest, the idea of strapping on thin planks and trying to glide across icy, hilly terrain can be intimidating. Many adult beginners fear looking foolish, constantly falling, or struggling with the perceived complexity of the technique. I certainly did! One common misconception is that you need to be incredibly fit or an experienced downhill skier to even attempt langrenn. Not true at all. While fitness certainly helps, beginners start on flat or gently undulating terrain, and the pace is entirely up to you. It's much more about balance and rhythm than brute strength initially.
Another fear is the cold. Norwegians have a saying, "There's no bad weather, only bad clothes." And frankly, they're right. With the right layering, you'll be surprisingly warm, especially once you start moving. The biggest challenge for many foreigners is simply the unfamiliarity. We didn't grow up with skis strapped to our feet, so the movements feel alien. But trust me, with a bit of patience and the right approach, those fears will melt away faster than snow on a spring day. You will fall, probably many times, but it's part of the learning process, and usually, the snow is soft enough that it's more embarrassing than painful.
Getting Started: Gear, Lessons, and First Steps
Conquering those initial fears means getting equipped and learning the ropes properly. Don't rush into buying the most expensive gear, and definitely consider professional instruction. It will save you a lot of frustration.
Essential Gear: What You Really Need and Where to Find It
Before you even think about hitting the trails, you'll need the right equipment. Here's a breakdown of the essentials:
- Skis: For beginners, focus on "felleski" (skin skis) or "smørefrie ski" (wax-free skis). These have a textured base or integrated skins underfoot that provide grip for pushing off, eliminating the need for complex waxing – a huge relief for novices! Length-wise, a good rule of thumb for classic cross-country skis is about 15-25 cm taller than your height.
- Boots: Cross-country ski boots are much softer and more flexible than downhill boots. Comfort is key here. Make sure they fit snugly but allow for good ankle movement. There are different binding systems (NNN, SNS, Prolink), so ensure your boots are compatible with your chosen skis’ bindings.
- Poles: Poles should come up to about your shoulder height or slightly below your armpit when standing upright. They're essential for propulsion and balance.
- Clothing: This is critical for comfort. Think layers!
- Base layer: Merino wool is king in Norway. It wicks moisture away and keeps you warm even when damp. Avoid cotton. Our guide on Wool Underwear (Ullundertøy): Why Norwegians Insist You Wear It can give you more insights.
- Mid-layer: A fleece or light wool sweater for insulation.
- Outer layer: A wind and water-resistant jacket and trousers. These don't need to be super thick; the insulation comes from your base and mid-layers. Look for something breathable.
- Accessories: Warm gloves or mittens, a buff or neck gaiter, and a thin hat or headband.
- Daypack: A small backpack for water, a snack (kvikk lunsj is traditional!), an extra layer, and perhaps a small thermos with hot tea.
Where to find gear:
- Renting: If you're unsure if cross-country skiing is for you, renting is an excellent option. Many ski centers, especially those near major cities like Skullerud Sport Senter in Oslo or Fana Skianlegg in Bergen, offer rentals. This allows you to try different equipment and avoid a significant upfront investment.
- Buying New: Sports stores like XXL, G-Sport, and Intersport are ubiquitous and often have sales. The staff are usually knowledgeable, but don't be afraid to ask for English-speaking assistance.
- Second-hand: For budget-conscious expats, the second-hand market is a goldmine. Websites like Finn.no (specifically the "Torget" section) are fantastic for finding gently used gear. Also, check out local Facebook groups for expats or "buy/sell" groups. Keep an eye out for ski swaps (skibytte) organized by local clubs in the autumn. For general tips on finding second-hand items, our post on Buying Second-Hand on Tise or Finn to Save Money might be useful.
Finding Your Feet: Lessons and Beginner Trails
Learning on your own is possible, but I strongly recommend taking a lesson. It’s like learning to drive; you can fumble through it, but proper instruction will give you the foundational skills and confidence much faster.
- Group Lessons: Many ski schools, often associated with larger ski centers, offer group lessons for adults. These are typically more affordable and a great way to meet other beginners. You’ll learn the basic techniques in a structured environment.
- Private Lessons: If you prefer one-on-one attention or have specific concerns, a private lesson can be incredibly effective. While more expensive, the personalized feedback can accelerate your learning curve.
- Beginner-Friendly Trails: Look for flat, wide, and well-groomed trails. Many ski areas have designated "light" or "easy" loops. Near Oslo, Sognsvann, Frognerseteren, and Skullerud are popular spots with great beginner terrain. In Bergen, Fana Skianlegg offers good starting points. These areas are usually well-lit in the evenings, which is a blessing during the dark Norwegian winter. Getting to these locations often means relying on public transport, so familiarizing yourself with Public Transport in Oslo (Ruter): Zones, Tickets, and Monthly Passes or similar guides for other cities is a good idea.
During your first outings, focus purely on balance and getting a feel for the skis. Don't worry about speed or elegance. Practice shuffling, gliding, and most importantly, getting up after you fall. Falling is inevitable, and it's a badge of honor, really.
Mastering the Basics: The Diagonal Stride and Braking
Your first lessons will likely focus on these core techniques:
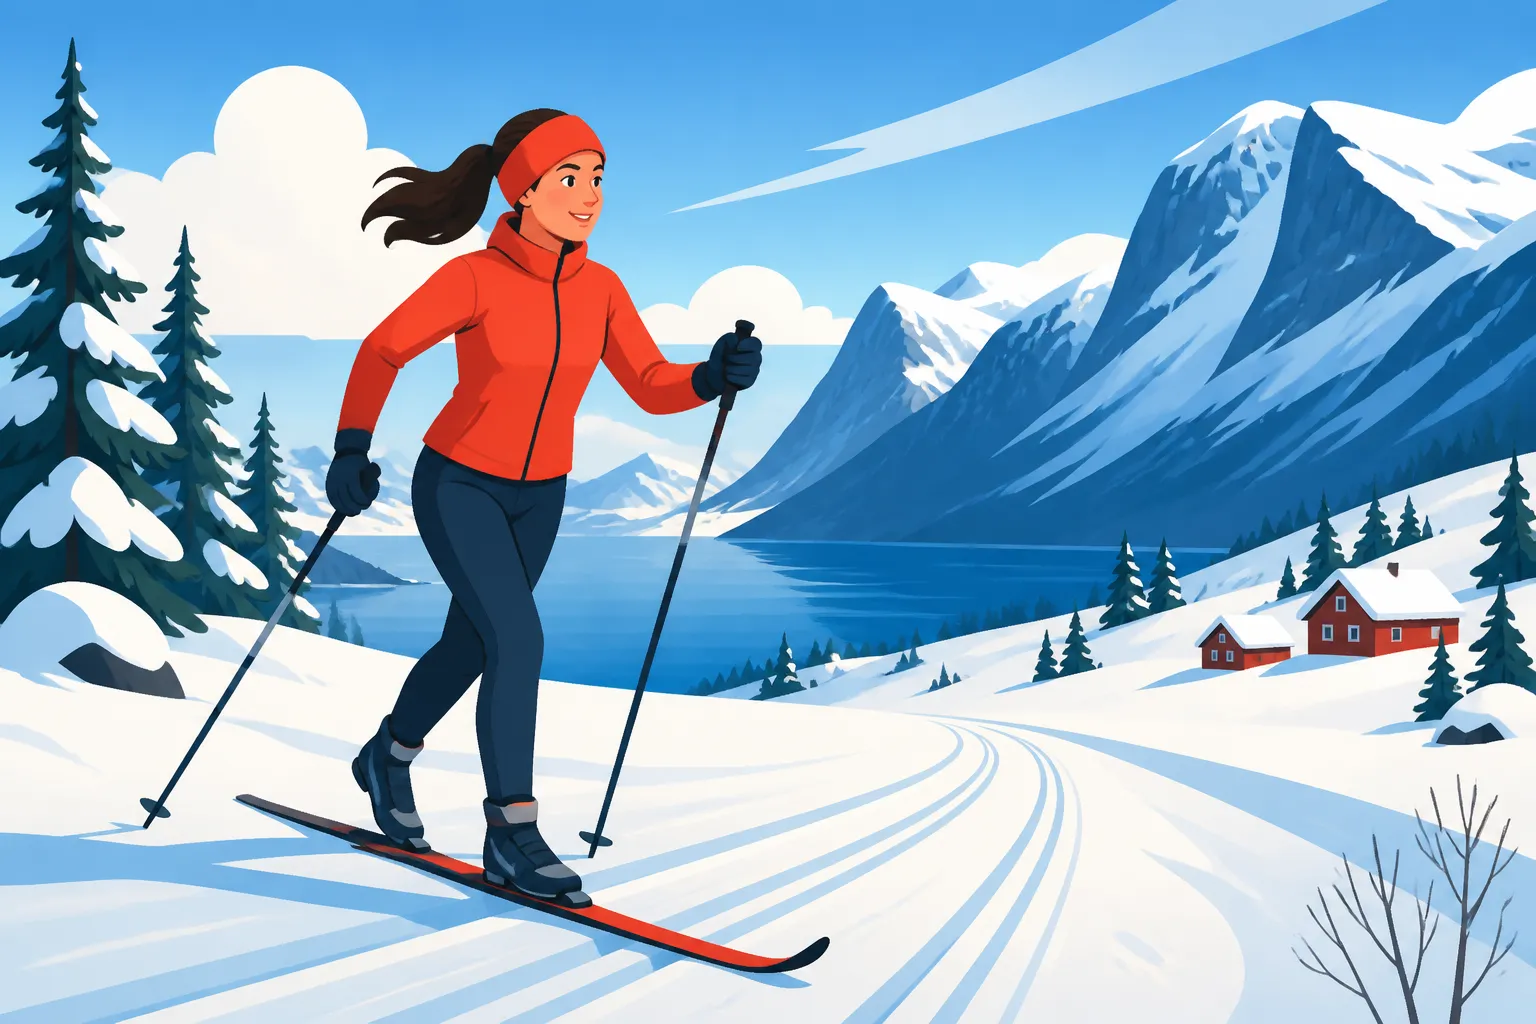
- The Diagonal Stride (Klassisk): This is the fundamental movement for classic cross-country skiing. It mimics a walking or running motion but with a glide. You push off with one leg while simultaneously planting the opposite pole and gliding forward on the other ski. The key is rhythm and weight transfer. Think about "walking tall" and letting the skis do the work. It feels awkward at first, but with practice, it becomes fluid. Your goal is to feel the feste, the grip under your foot, when you push off, and then a smooth glide.
- Braking (Plog): Also known as the "snowplow" or "wedge," this is crucial for controlling your speed, especially on gentle downhills. You form a "V" shape with your skis, heels together, tips apart, and press your edges into the snow. The wider the V and the more pressure you apply, the slower you go. Practice this on a very gentle slope until you feel confident. This is your safety net!
- Turning: For beginners, a simple step-turn (where you lift one ski and step it around) is usually sufficient on flat terrain. On gentle downhills, you can combine a slight snowplow with shifting your weight to one side to initiate a turn.
Remember, practice makes perfect. Spend time on flat sections just gliding and feeling your balance. Don’t be afraid to go back to basics even after you’ve had a few lessons. The muscle memory builds over time.
Practicalities and Progression: From Beginner to Enthusiast
Once you've got the hang of the basics, you'll want to explore more and improve your technique. This is where the real fun begins and you start to see why Norwegians are so passionate about their langrenn.
Where to Ski: Accessible Trails Near Major Cities
Norway is incredibly well-equipped for cross-country skiing, with an extensive network of groomed trails, often meticulously maintained by local ski clubs. You don't need to travel far to find excellent conditions.
- Oslo: The capital boasts an incredible advantage: the Nordmarka, a vast forested area easily accessible by public transport (T-bane to Sognsvann, Frognerseteren, or bus to Skullerud). Here you'll find hundreds of kilometers of marked, groomed trails, many of which are lit at night for evening skiing. The Skiforeningen website (skiforeningen.no) is an indispensable resource for updated trail conditions, maps, and events.
- Bergen: While Bergen is known for its rain, when the snow falls, locals head to areas like Fana Skianlegg, Totland, or Kvamskogen (a bit further out). The local bus network can get you to some trailheads.
- Trondheim: Bymarka offers fantastic opportunities for cross-country skiing, with easy access from the city center. Like Oslo, many trails are lit and regularly groomed.
- Stavanger: When snow permits, locals often head to Sirdal, about a 1.5-hour drive away, which transforms into a winter wonderland with extensive ski trails.
- Tromsø: In the Arctic, cross-country skiing is an even more integral part of winter life. Areas like Tromsøya and Kvaløya have well-maintained trails, offering opportunities to ski under the Northern Lights.
Many of these major areas also have warming huts (skistuer) where you can buy a hot kakao (hot chocolate) and a waffle, which is a quintessential Norwegian experience. It’s the perfect reward after a good ski! For initial accommodation while you're figuring out the best locations for ski access, especially if you're trying out different areas, services like Spotahome can be useful for finding short-term rentals that might put you closer to these winter playgrounds.
Trail Etiquette and Safety Tips
The unwritten rules of the trail are important to know:
- Keep to the Right: Always ski on the right side of the trail.
- Faster Skis Pass on the Left: If you're going slower, allow faster skiers to pass you on your left. If someone says "Løype!" (track!), it means they want to pass.
- No Stopping in the Middle: If you need to stop, move to the side of the trail.
- Respect the Groomed Tracks: Try not to step on the perfectly groomed ski tracks (the two parallel grooves) if you're walking or standing around. These are for efficient gliding.
- Waxing: For wax skis (which you probably won't start with), knowing the day's wax forecast is crucial for good grip and glide. With felleski, this isn't an issue, but cleaning your skins regularly is still important.
- Staying Warm and Hydrated: Always bring water, even in the cold. Dress in layers you can add or remove.
- Check Conditions: Always check local trail reports (e.g., skiforeningen.no for Oslo) before heading out to ensure conditions are good.
- Tell Someone Your Plan: If you're venturing into more remote areas, especially alone, tell someone where you're going and when you expect to be back. Consider downloading offline maps or using a reliable eSIM from providers like Airalo to ensure you have phone connectivity for emergencies or navigation, even if you’re a bit off the beaten path.
- Sun Protection: Even on cold, cloudy days, the sun reflecting off the snow can cause sunburn and eye strain. Wear sunglasses or goggles and sunscreen.
Moving Beyond the Basics: Uphill, Downhill, and Longer Tours
Once you’re comfortable with the diagonal stride and braking, you can start tackling more varied terrain.
- Uphill Techniques:
- Herringbone (Fiskeben): For steeper uphills, you can turn your ski tips out into a "V" shape, like fish bones, and walk up the slope. This provides excellent grip.
- Side-stepping: For very steep or icy sections, you can walk sideways up the hill, stepping one ski up at a time.
- Double Poling: On gentle uphills or flat sections, use both poles simultaneously while gliding, for extra propulsion.
- Downhill Techniques:
- Plog (Snowplow): Still your best friend for controlling speed.
- Telemark Stance: A more advanced technique for longer descents, where you lead with one ski, bending both knees in a lunge-like position. This provides stability and control.
- Parallel Turns: Eventually, you might progress to more alpine-style turns for navigating faster downhills.
- Longer Tours: As your confidence and stamina grow, try connecting different trails for longer tours. This is where you really get to appreciate the vastness and beauty of the Norwegian wilderness. Pack a good lunch, plenty of fluids, and enjoy the journey. Our guide on Surviving the Norwegian Winter: Clothing, Heating, and Mørketid (Dark Season) offers valuable tips for staying comfortable on extended winter outings.
Remember, progression is gradual. Don't feel pressured to keep up with seasoned Norwegians. Celebrate your small victories, like making it up a hill without falling or executing a controlled downhill.
Overcoming the Expat-Specific Challenges
Learning a new sport in a new country can present unique challenges beyond the physical ones. Here’s how to navigate them.
Language Barriers in Lessons and Equipment Shops
While many Norwegians speak excellent English, there might be times when you encounter a language barrier, especially in more local ski shops or group lessons taught primarily in Norwegian.
- Prepare Key Phrases: Before going to a shop or lesson, learn a few key Norwegian words related to skiing (e.g., "ski," "støvler" – boots, "staver" – poles, "begynner" – beginner, "leie" – to rent, "kjøpe" – to buy).
- Ask for English: Don't hesitate to politely ask, "Snakker du engelsk?" (Do you speak English?). Most people will be happy to switch.
- Visual Aids: Pointing, miming, and using photos on your phone can bridge communication gaps, especially when discussing equipment.
- Online Resources: Use translation apps or Helsenorge.no (relevant for general healthcare navigation, though perhaps not directly for ski shop language, but good for understanding Norwegian systems). If you are looking to learn the language more broadly, our guide on Learning Norwegian for Work: Norskprøven and Language Courses might be helpful.
- Seek Out English-Speaking Instructors: When booking lessons, specifically inquire if they have English-speaking instructors available. Many larger ski schools cater to international visitors.
Building a Skiing Community and Finding Partners
One of the joys of langrenn is sharing the experience. It can be hard to find activity partners when you're new to a country.
- Join Local Ski Clubs: Many municipalities have local skiklubber (ski clubs). These often organize group outings, lessons, and social events. It’s a fantastic way to meet locals and other expats who share your interest.
- Facebook Groups: Search for expat groups in your city (e.g., "Expats in Oslo") or specific "skiing in [city]" groups. People often post looking for partners.
- Meetup.com: This platform sometimes has groups dedicated to outdoor activities, including skiing.
- Work Colleagues: If you have Norwegian colleagues, ask them about their skiing habits. You might find a ski buddy right in your office.
- Ski Events: Attend local ski races or turrenn (touring races), even as a spectator initially. It’s a great way to soak in the atmosphere and meet people. You’ll find a lot of people are very keen to encourage newcomers.
Budgeting for Your New Hobby
While the outdoors itself is free, the equipment, lessons, and transportation can add up. It’s wise to factor this into your overall Cost of Living in Norway 2026: Budgeting for Singles and Families.
- Initial Costs:
- Renting: Expect to pay around NOK 200-400 for a full day's rental of skis, boots, and poles. Multiple-day rentals are often cheaper per day.
- Lessons: Group lessons can range from NOK 300-800 for a few hours. Private lessons are typically NOK 600-1200 per hour.
- Buying New Gear: A full beginner set (skis, boots, poles, bindings) can cost anywhere from NOK 3,000 to NOK 7,000+.
- Clothing: Can be a significant investment, especially if you're starting from scratch. Expect to pay NOK 1,000-3,000+ for good quality base, mid, and outer layers.
- Ongoing Costs:
- Trail Fees: Some private ski areas or special events might have a small fee, but most public trails are free.
- Wax/Maintenance: If you opt for wax skis, waxes and tools will add a small cost. Even felleski benefit from occasional cleaning and glide wax on the tips/tails.
- Transportation: Bus or T-bane tickets to trailheads will be an ongoing cost.
- Waffles and Coffee: An essential "cost" for the full Norwegian experience!
To save money, definitely prioritize renting initially. Leverage the second-hand market for good quality gear. Many Norwegians upgrade their equipment regularly, so there are often great deals to be found. Remember, this isn't just an expense; it's an investment in your health, well-being, and integration into your new home. It’s one of the best ways to truly feel like you belong in Norway during the long winter months.
Disclaimer
The information provided in this guide is for general informational purposes only and does not constitute professional advice. While we strive to ensure accuracy and provide up-to-date information, circumstances can change. Always consult with relevant experts, such as ski instructors, equipment retailers, or local authorities, for specific advice tailored to your situation. Engaging in outdoor activities like cross-country skiing carries inherent risks; always prioritize safety and be aware of current weather and trail conditions.